- “You won't believe your eyes!”
- ― Postcard for Point Prometheus
The Proving Grounds is the penultimate and one of the most difficult levels of BioShock. Jack must run the gauntlet through a derilect museum while protecting a vulnerable Little Sister in order to gain access to his final opponent at the top of Point Prometheus.

History

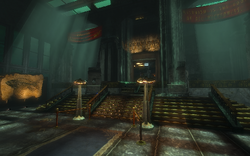
The Museum Lobby Entrance.
Originally, when Point Prometheus was a normal scientific research facility, the Proving Grounds were known as the Memorial Museum, a grand establishment where citizenry could view and learn about the splendors of the surrounding sea. After Big Daddies were assigned to become the protectors of Little Sisters, the entire location was hastily converted into the Big Daddy Proving Grounds, where the Protectors are trained in the defense of the Gatherers. The complex is topped with a dome and the tower at the west end is the tallest structure in Rapture.
BioShock


The gravely damaged South Exhibit Halls.
- Main article: BioShock

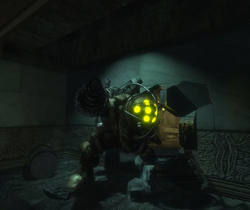
The rogue Bouncer bursting through a wall.
The Museum is one of the most powerful visuals demonstrating Rapture's fall. What was once a place of knowledge has now been reduced to a corpse-ridden training gauntlet for the gruesome pairs that roam Rapture. While a few of the exhibits have been stored in the Gift Shop, most have just been left in their displays and are now damaged. The Gift Shop itself is in a state of disrepair and has mostly been picked clean by the many insane Splicers which now wander the halls. When the player first enters the museum, gunfire and the rumbling roars of a Big Daddy can be heard from the lower floor. A Baby Jane is seen duking it out with a Rosie. The Big Daddy shoots the Splicer, but, in her death throes, she fires her machine gun at the ceiling. This causes one of the two whale skeletons suspended above the museum to come loose from its cables and crush the Big Daddy as it falls.
The winding hallways of the Proving Grounds are spotted with fresh corpses from which Little Sisters gather ADAM while Big Daddies protect them. Jack must follow a Little Sister to proceed through specially locked doors to get to Fontaine. To Tenenbaum's chagrin, the Little Sisters mental conditioning still forces them to stop and harvest ADAM before leading Jack on. The Little Sisters are no longer implanted with a slug, and are therefore physically vulnerable to attack. These gathering sessions form the main focus of the mission in this area: escorting the girl safely through the Proving Grounds' linear route (divided into sections by genetically locked "Little Sister doors") while defending her from Splicers, Turrets, and finally a rogue Bouncer. When the player first enters the lower portion of the Central Atrium, the Bouncer can be seen up on a balcony opposite, staring momentarily (and menacingly) at the player, then doing an about-face and charging through a door. Towards the very end of the Proving Grounds route, this Big Daddy breaks through a wall and angrily charges the player.
After dealing with the Big Daddy, Jack and the Little Sister enter the end of the museum called the Special Exhibit Entry. This place once took visitors up via elevator to large, unique exhibits on the top floor, but now Jack heads up there to confront his enemy. Before leaving, Jack restocks his ammo and the Little Sister offers him her Harvesting Tool to take down Fontaine.
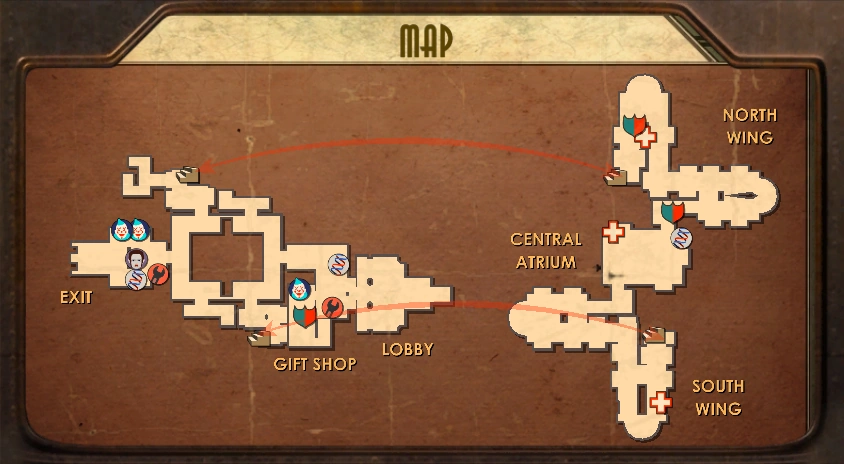
Map
Station
Machine
Garden
Bank
Panel
Station
Diary
Tonic
Tonic
Tonic
Walkthrough
| Extended Walkthrough |
|---|
Basics
Here We Go
First Stop
Once More into the Abyss
Second Stop
On the Road Again
Third Stop
Last Move
Preparing for Fontaine
When done, take the elevator to battle Fontaine. |
Gallery
")
")
")
")
")
")
")
")
")
")
Bugs / Glitches

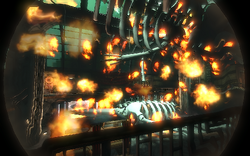
The Central Atrium.
-
 Shooting the fallen whale skeleton with exploding buck shot or igniting it with Incinerate! will cause the entire Central Atrium to be engulfed in flames that do not harm the player.


- Possible failure of developers, allows you to transit testing area with 1 or more Little Sister: After you complete the testing area. Take the syringe ADAM little sister's hand (do not go now face the Fontaine), return to Point Prometheus, wait for the door to open map. After that, go back to the testing area, will see a dialog Tenenbaum, allowing you to get attract once again a Little Sister. A tip: When you re-enter the testing area at the entrance of the museum, walk to the first door (which now does not need a Little Sister to open) before opening, note that there is a tube before opening the door and same direction after opening will see that there is another, walk to your left and you will see that in the south hall there are 2 tubes in the same provision. If you're quick, you can hit up to 4 tubes, so will attract 4 Little Sisters.[confirmation needed]
Just as the escort mission is about to be completed, the Little Sister might freeze near the Vent when she is supposed to go inside and deliver the Adam needle to the player. It is unknown what causes this, but the Little Sister will simply stay there forever, urging the player to hurry up. To fix this either reload a previous save (recommended if you saved halfway through the mission) or alternatively and very painfully, you'll have to exit the Proving Grounds through the Bulkhead and enter again, this will respawn a Little Sister near you at full health and she will take the same path, however, she thankfully won't draw Adam from corpses making the journey much less enervating to the player.
Behind the Scenes
- The "Memorial Museum" sign reappears in the Rapture Memorial Museum in Ryan Amusements in BioShock 2.
- Both the Bouncer and Rosie types appear in this level: an Elite Rosie and the Bouncer that attacks Jack.
- Despite the Little Sister walking slowly, she will keep urging the player to hurry up.
- The rogue Bouncer in this level can be killed while he is staring at the player. If the player quickly hits it with Winter Blast when it is on the balcony, it can be shattered with the Machine Gun. This does not stop it from spawning and attacking the player at the end of the level, however.
- Strangely, when the player searches the rogue Bouncer, it is listed as "Elite Bouncer", but it does not have the red trim or harpoon drill.