

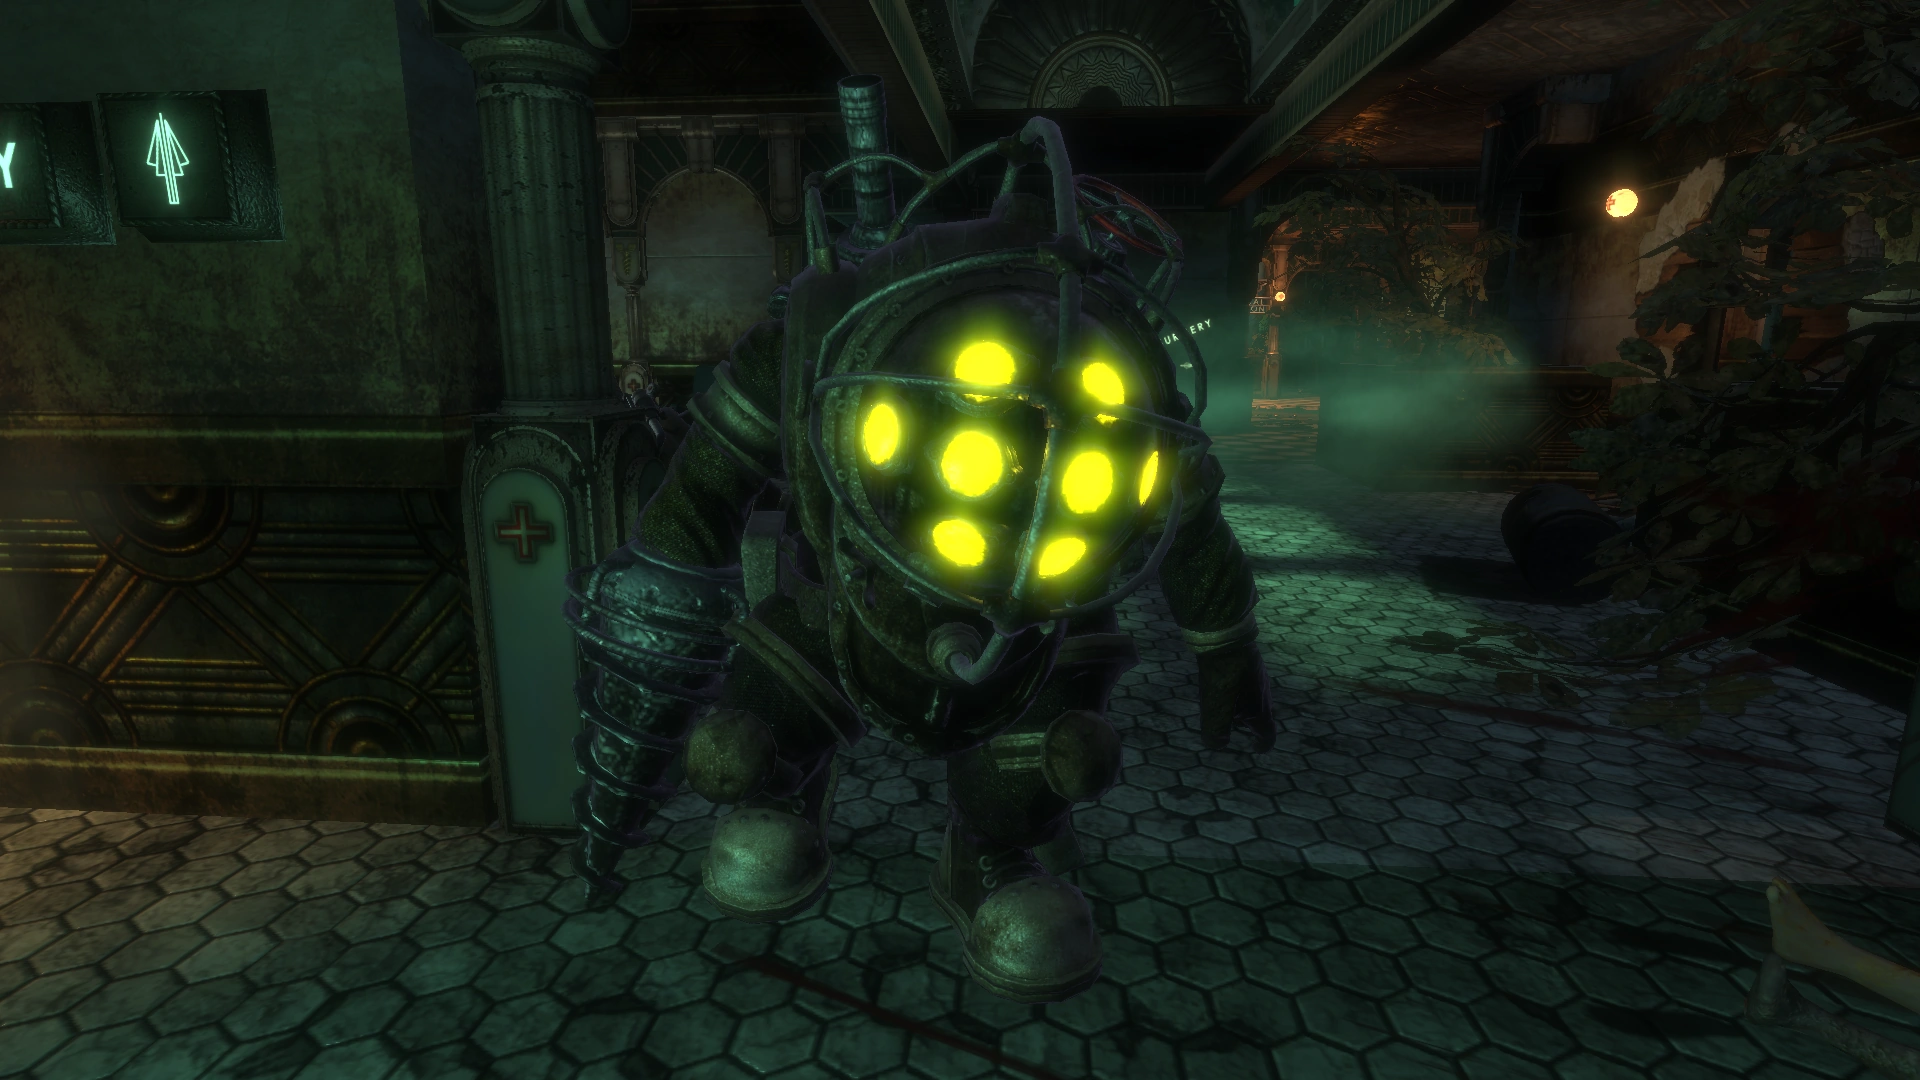
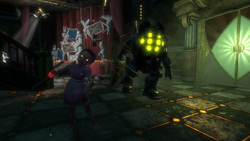
The Bouncer is one of the five functional types of Big Daddies, along with the Rosie, Rumbler, Alpha Series and the Lancer. Bouncers are more agile than Rosies, but are entirely ineffective in ranged combat. The Bouncer's main weapon is an over-sized Drill (and, in the case of an Elite Bouncer, a spinning harpoon) attached to its right arm and powered by the internal combustion engine on his back. They generally attack using powerful blows at close range, with a fast charge being their only offensive long range ability.
BioShock
- Main article: BioShock
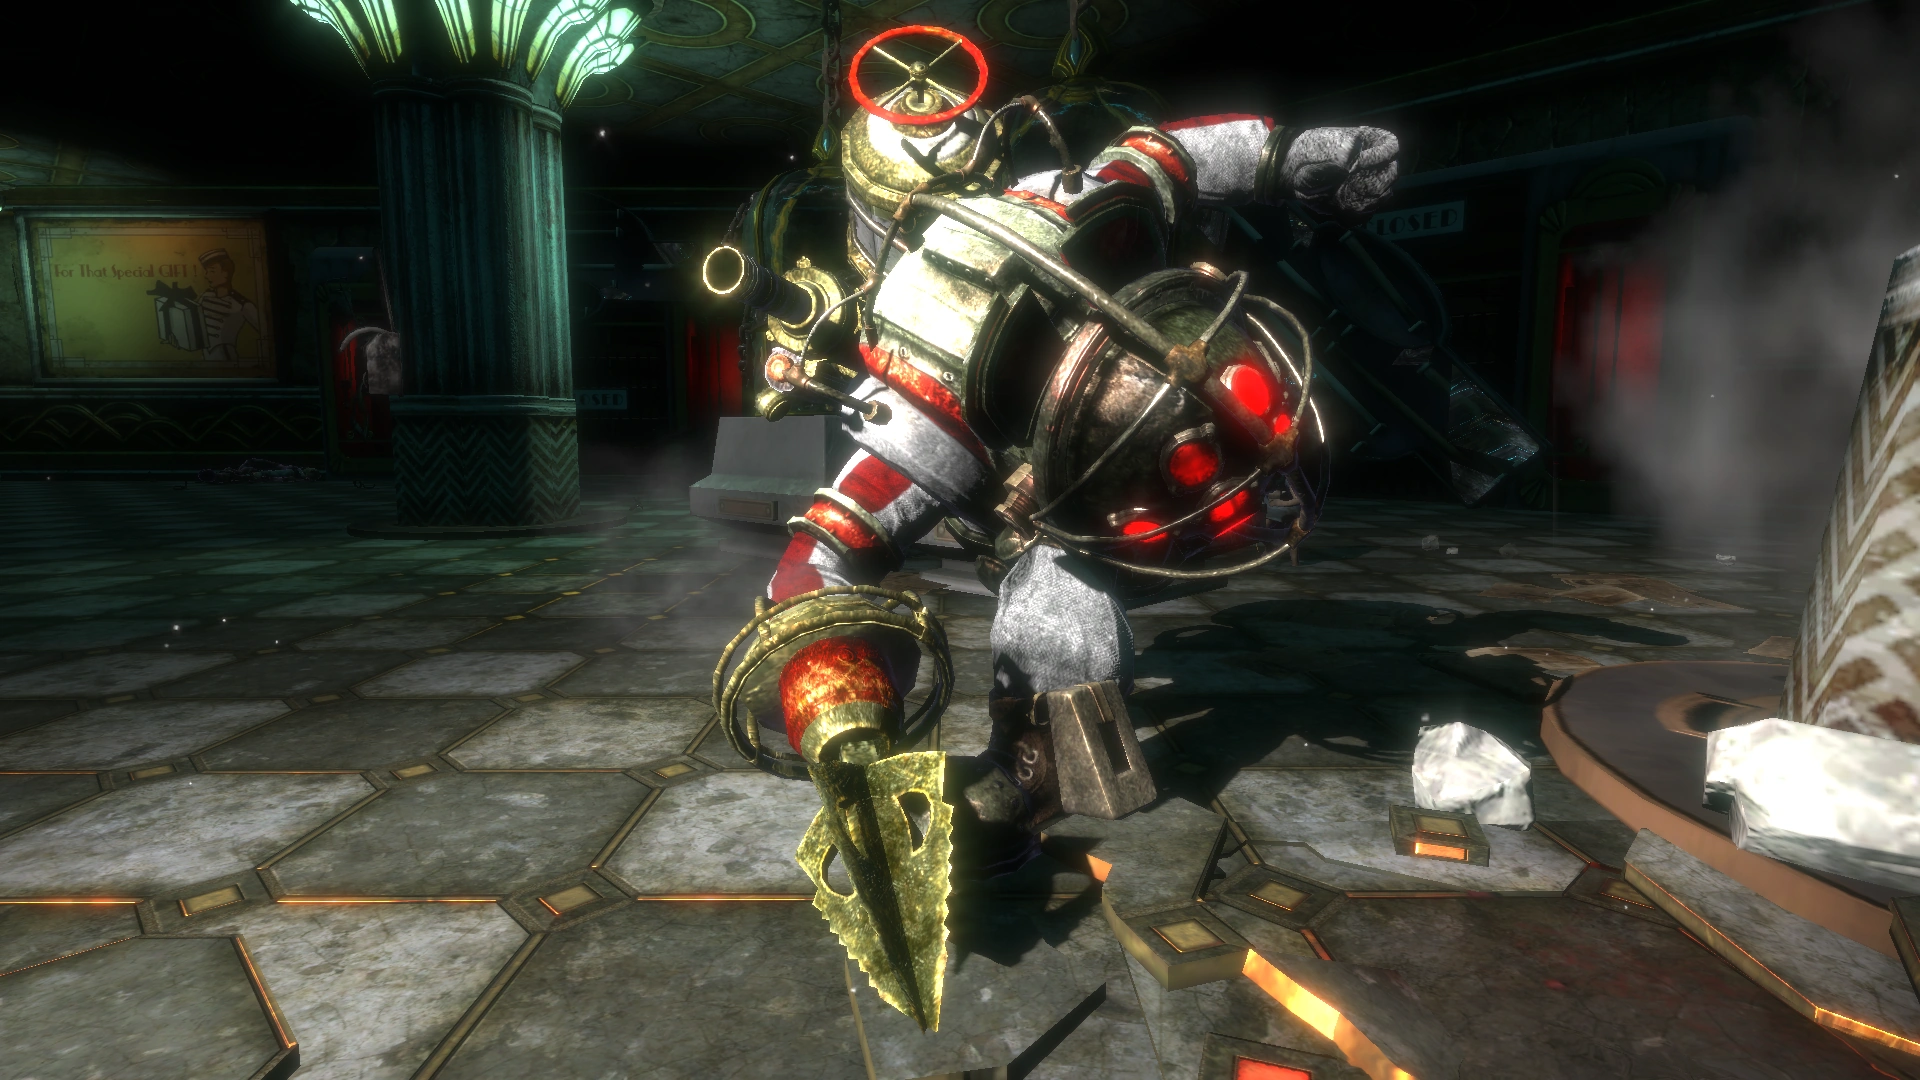
In addition to normal Bouncers, the player encounters Elite Bouncers, which use a spinning harpoon instead of a drill, are decorated with red stripes, and are more difficult to deal with than the earlier Bouncer. The regular Bouncers are encountered in Welcome to Rapture and the Medical Pavilion. The Elite Bouncers are present in Fort Frolic, Hephaestus, and a single one in the Proving Grounds.
Bouncer "Moods"
The Bouncer, like the Rosie, the Rumbler and the Lancer, has three "moods" that may occur when the player encounters them. These moods appear as the color of the small portholes on the Bouncer's helmet, along with his wrist.
- Green Light: A Big Daddy under the effects of Hypnotize Big Daddy will produce a green light from their portholes. These Big Daddies are friendly to the player, and will protect them as if they were a Little Sister.
- Yellow Light: A Big Daddy with yellow lights emanating from its portholes is neutral to the player, and will not attack them. By default, unscripted Big Daddies always start out in this mood. Some scripted Big Daddies spawn in other moods, but this is just for the purpose of effect.
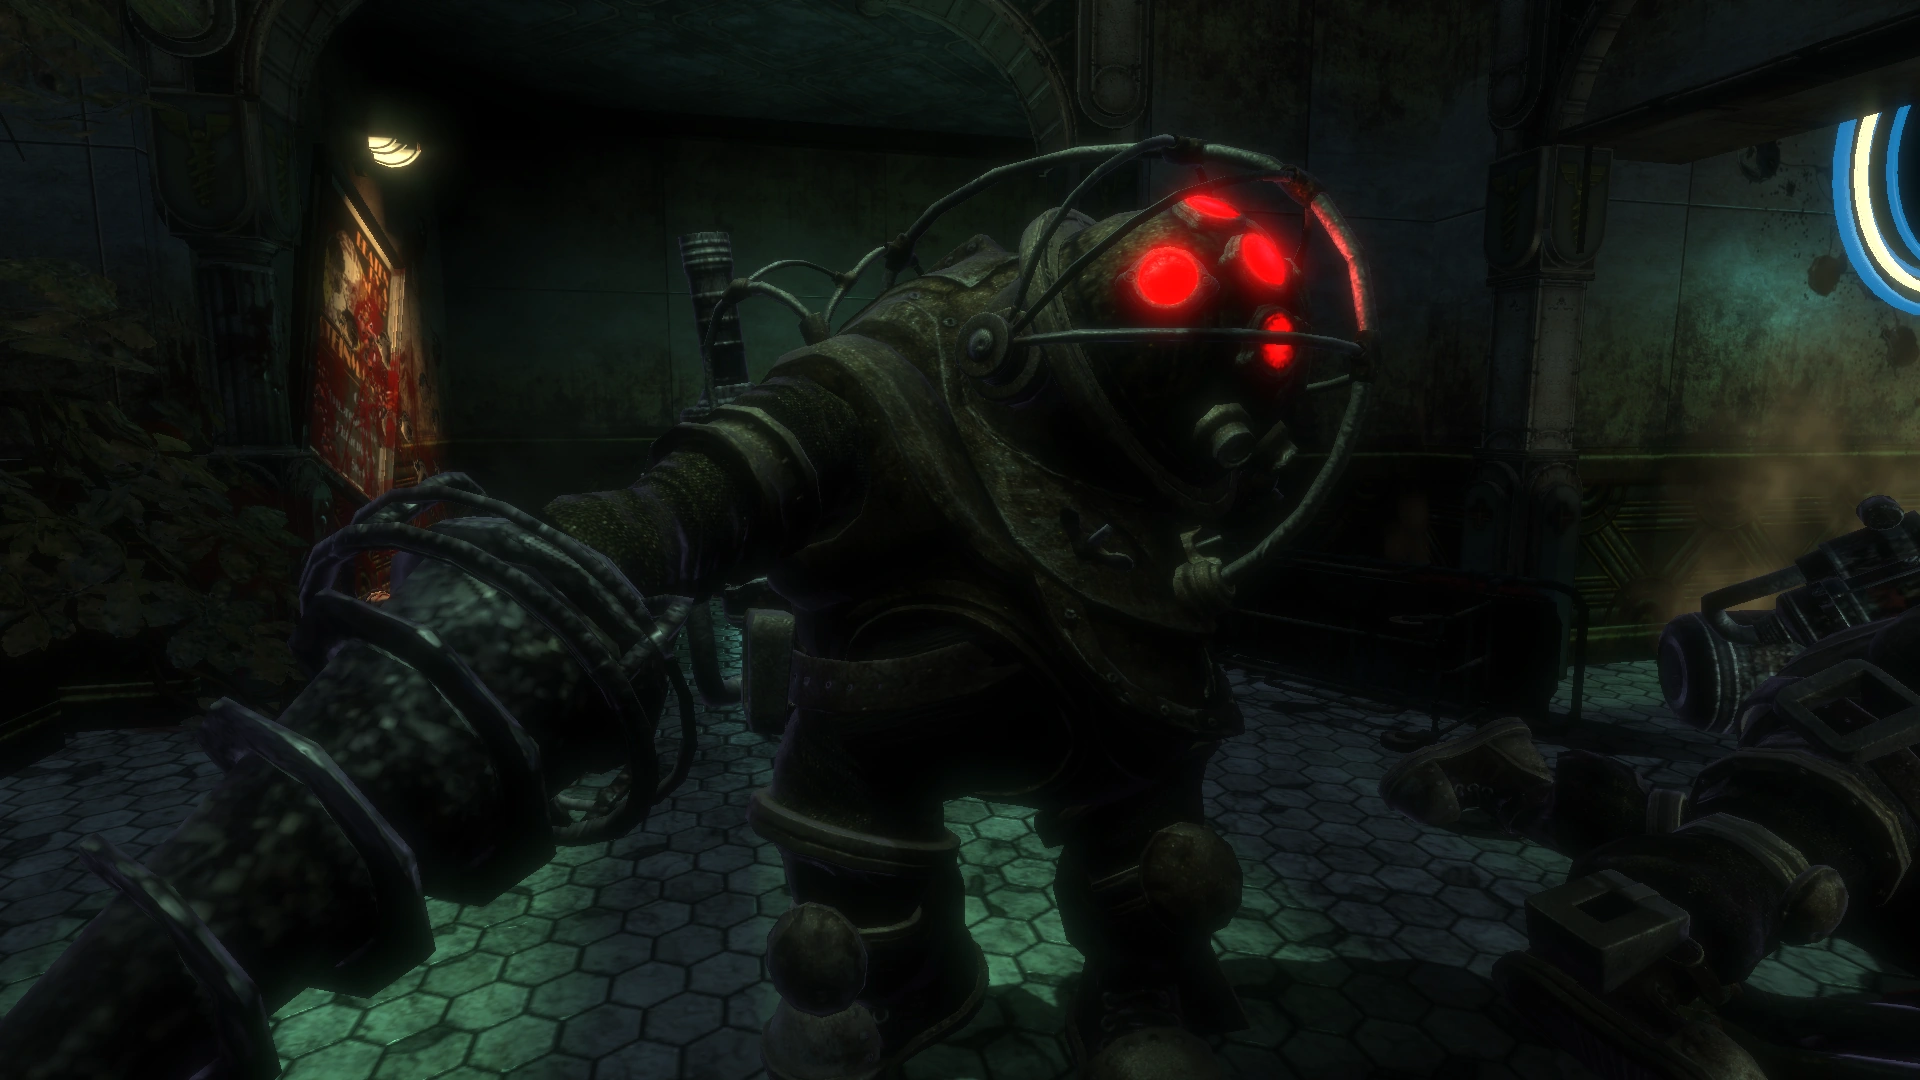
- Red Light: A Big Daddy attacked by the player or under the effects of Enrage will produce a red light. In the first case, the Big Daddy will attack the player. In the second, it will attack anyone in its vicinity.
Attacks
When in combat, the Bouncer will produce three different kinds of attack:
- Drill Slam: In this attack, the Bouncer slams the ground with its drill, causing a tremor in the surrounding area and disorienting anyone in the radius. Usually the Bouncer will follow this up with a Charge; the foe will often be too sluggish to avoid it.
- Drill Punch: This is the Bouncer's basic attack, it is accomplished when it drills into its foe. If against a Splicer, the victim is killed instantly. In the case of the player, the attack deals a severe amount of damage, killing the player if they are low on health.
- Charge: If the victim is far from the Bouncer, it will charge at them at high speed. This knocks the foe back, dealing them damage in the process. In the case of the player, they will also have their camera swung around and temporarily blurred, momentarily disorienting them.
Strategy
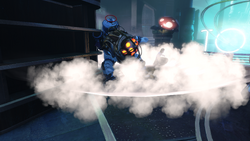
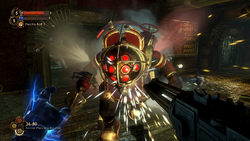
A Bouncer attacking.
While many strategies may apply equally well to all Big Daddies, each type has their own particular characteristics worth noting, which may lead to specialized tactics.
General
- When retrieving or returning a Little Sister from/to a vent, Big Daddies are temporarily invulnerable until they finish the animation. Attacking them at this point needlessly enrages them and wastes ammunition or EVE; wait until they are finished with the animation before attacking.
- Always ensure one has full Health, as well as a reliable supply of First Aid Kits, EVE and ammunition before fighting a Big Daddy, as these are one of the toughest enemies in the game.
- It is recommended to study a Big Daddy's path and stalk them, so as to attack them where the player has the biggest advantage. Study the environment as well, so as to be able to formulate a winning strategy.
- Always ensure one has complete control over the fighting area (i.e. the place is clear of Splicers and all Security Devices have been hacked). Loss of control might signify defeat in the later stages of a fight.
- Never take on another enemy while dealing with a Big Daddy, except in some unique cases (see below). If the player is forced to fight another enemy, take it down first and come back to the Big Daddy.
- Little Sisters always stop to drain ADAM from any nearby corpse they find. Corpses can also be moved by the player, enabling them to choose where they want the Big Daddy they're targeting to halt.
- Piling up several explosives onto a Big Daddy's path (preferably on top of an oil slick) and blowing it up at the right moment is a cheap and effective way of killing, or at least severely injuring, a Big Daddy. If the enemy survives, they will be on fire, which will drain their health continuously.
Bouncer
- When starting a fight, always try to assault a Bouncer from a ledge, or at least ensure the Bouncer will take some time to get to the player. In this fashion, the player will be able to take free shots at the Big Daddy before he can get a chance to hit the player. In close proximity (BD in melee mode), by jumping back and forth over an obstacle (ex- the counter in Medical Center on upper level with the cash register on it) you could throw off the BD to stop his physical attacks. While it is again moving to reach you, you fire at him long enough to kill him. Repeat if needed.
- When charging, Bouncers cannot change their path, and will continue in a straight line no matter what. Not only can the player use this to dodge their attack, but they can also exploit it to set traps into a Bouncer's path and provoke them into charging through them.
- Bouncers always take the shortest route to the player, making their movements very predictable. This can be used to one's advantage in a variety of ways, such as when placing traps or when aiming at the Bouncer.
- One of the main strategies the Bouncer relies on is disorientation. If the player can keep a cool nerve and steady aim, they will wield a significant advantage over this enemy type.
How to kill a Bouncer/Rosie in 7 seconds using only one shot of Incinerate
Equip Incinerate! (any level). You should have the Natural Camouflage gene tonic.
- Disable any of your bots a distance away from a Little Sister Vent that a Big Daddy is going towards to prevent them from catching fire or exploding.
- Using the Telekinesis Plasmid, pile one or two dead bodies right next to the vent. If there's a dead Big Daddy that's even better. While holding a dead body, change your weapon and the body will drop on that location. This does not consume any EVE.
- Do a Quick save. A few seconds before the Big Daddy reaches the vent, light the corpses on fire. Your distance from the vent should be close (about the length of a dead body). Right after you light it, you should become invisible if you have timed it right.
- The burning corpses will ignite the Big Daddy. His headlights will turn red but since he can't see you, he can't do anything. He will stand on top of the burning corpses and his health will deplete quickly. This is much faster than simply being on Incinerate with no burning corpses around. The reason is that burning corpses produce their own damage, which is very high. Multiple corpses produce even more damage.
- If the Big Daddy wanders away, load the game again and try again. Ideally he should keep standing in the pile of burning dead bodies.
- If you're successful, he can die within a few seconds, and you have only used one shot of incinerate. In Medical Pavilion, using a dead Big Daddy, you can kill a Big Daddy using the dead body of another in just 3 seconds.
Another way to kill a Big Daddy in just one use of EVE is using Security Bullseye if you have a security camera nearby.
Recommended Plasmids

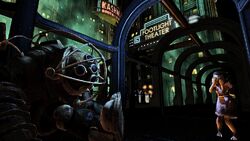
An Elite Bouncer charging.
General
- Hypnotize Big Daddy is, obviously, a prime choice when faced with a Big Daddy, as it turns the hulking creature into the player's bodyguard. It can also be used to pit two Big Daddies against each other, which is both an entertaining and effective way of killing them.
- Enrage can be used in a similar fashion: by Enraging a Big Daddy, the player can clear an entire room to a minimal cost in EVE. Make sure one takes their distance, as the Big Daddy may assault the player if they are the closest to them.
- Incinerate! is recommended against Big Daddies, as a single cast will drain a significant portion of their health over time.
- Telekinesis may come in handy if there are explosives lying around. It can also help the player formulate various different strategies (see above and below).
- Electro Bolt will temporarily stun the Big Daddy, as well as deal increased damage (especially in water). Do not attempt to One-Two Punch the Daddy unless one possesses the correct Gene Tonics, though, as the Wrench deals only quarter damage against Big Daddies. It can stop a Bouncer from charging or stun them long enough to pull out the grenade launcher or crossbow and land a perfect shot.
- Insect Swarm will distract the Big Daddy as well as deal continuous damage, allowing the player to take potshots at it.
- Winter Blast can help the player quickly dispatch a Big Daddy, as it stuns them and reduces the amount of damage needed to destroy them. However, their corpse will shatter, leaving no loot.
- Security Bullseye can single-handedly take down a Big Daddy if the player performs the following strategy:
- First of all, hack a nearby machine and direct the flow towards an Alarm Tile.
- Paint the target Big Daddy with Security Bullseye (Note: as this deals no direct damage, this won't cause the Big Daddy to attack the player in any way).
By the end of the alarm, the Big Daddy will be either severely weakened or dead, without the player risking themselves at any point. Note: This strategy is more effective on Bouncers as they cannot destroy Security Bots unless they stray too low.
Bouncer
- Cyclone Trap, although it has no effect on Big Daddies, prevents them from passing through the vortex. This can be used to prevent a Bouncer from getting to the player, for example by setting up a wall or a protective ring around the player (or the Bouncer).
- Target Dummy can be used to lead a Bouncer to charge into a trap (for example, by setting a trap under or behind the dummy). This also temporarily distracts the Big Daddy.
Recommended Weapons and Ammunition


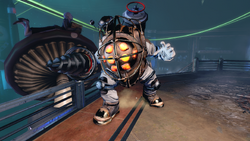
An Elite Bouncer attacking.
General
- Electric weaponry such as Electric Gel and Electric Buck are the best form of ordnance against Big Daddies: not only do they deal much more damage against them than with any other ammo type, but they also temporarily shock Big Daddies, stunning them.
- Armor-piercing ammo also deals increased damage against Big Daddies, although not as much as electric ammunition.
- Although the Wrench only deals 25% damage against Big Daddies, if fully upgraded with the right Tonics it is still capable of dealing very high damage against them, especially when used in conjunction with Electro Bolt. On Hard, it takes a maximum of five One-Two Punches to kill any Big Daddy on any level.
- Exploding Buck deals very high amounts of damage and sets the target on fire, making it a very good choice in this type of fight. On Hard, no more than six shots are required to kill any Big Daddy on any level.
- Frag Grenades and Heat-Seeking RPGs, because of their high damage output, are a useful tool against Big Daddies. Note: If tackling a Bouncer, it is better to have the upgrade that renders the player immune to self damage, otherwise one may end up losing a lot of health.
- Proximity Mines are incredibly versatile when it comes to Big Daddies. One of the most popular strategies involves attaching several Proxy Mines onto a physics object (preferably an explosive) and firing it at the target Big Daddy using Telekinesis. This usually ends up killing or at least severely weakening the aforementioned victim.
- Napalm, although not as effective as Electric Gel, is nevertheless capable of taking down a Big Daddy in a couple of seconds.
- Liquid Nitrogen presents the same characteristics as Winter Blast, and both can be used interchangeably. Using a full tank of Liquid Nitrogen (or 50 units if upgraded in ammo efficiency) will keep it frozen long enough for the player to shatter it. Although a safe and relatively fast way of killing the Big Daddy, it will not drop any loot, just like anything else that's shattered. (Big Daddies tend to drop rare U-invent items and around $70).
- Although headshot bonuses do not apply to Big Daddies, Steel-Tip Bolts and Incendiary Bolts (especially the latter) are still capable of dealing high amounts of damage to Big Daddies. On Hard, a maximum of six Steel-Tip Bolts or five Incendiary Bolts are required to kill any Big Daddy on any level. Five Trap Bolts will take down a Big Daddy on Survivor difficulty.
Bouncer
- Trap Bolts and Proximity Mines are particularly effective against Bouncers, as they can be fired onto their movement path. One may also lay the traps and then proceed to coerce the Bouncer into charging through. In the case of Proximity Mines, placing several explosives near the mine will save ammunition.
- Liquid Nitrogen allows the player to stop a Bouncer's charge attack instantly, which is useful when the player is stunned and dodging it is difficult. This tactic uses only a few units of fuel, costing far less than Plasmids. With a full tank of fuel the player will likely never need to reload during the fight, avoiding the delay of having to refill EVE after every few Plasmid uses.
Recommended Tonics

An Elite Bouncer with a Little Sister.
General
- The Armored Shell line of Tonics will significantly reduce damage received by a Big Daddy's attacks, making this a very useful Tonic to have during combat.
- EVE Saver will reduce the cost in EVE when casting Plasmids.
- The Damage Research line of Tonics will significantly increase damage dealt against enemies researched using the Research Camera. The effectiveness of this Gene Tonic is entirely dependent on how much research the player has done.
- The Medical Expert line of Tonics will help the player save up on First Aid Kits.
- The Electric Flesh line of Tonics, in addition to making the player resistant or even immune to electrical damage, will significantly increase the effectiveness of all electricity-based attacks.
- The Human Inferno line of Tonics increases fire resistance in addition to damage from all fire-based attacks, in case the player prefers incendiary ammo.
- Using Frozen Field (1 and 2) in combination with SportBoost (1 and 2) and Bloodlust Tonics will allow the player to attack any Big Daddy quickly enough with the Wrench to keep it frozen until it shatters, without using any resources and taking no damage in return. The Big Daddy might get in one or two melee attacks early, but the damage is reversed by Bloodlust. This tactic takes a long time, even with Tonics and research, but it is capable of killing all Big Daddies without much difficulty.
Bouncer
- The Static Discharge line of Tonics will damage and stun any nearby enemy upon receiving a melee hit. Do not equip this if one wishes to use Hypnotize Big Daddy, as merely bumping into the Big Daddy will cause a discharge, and turn it against the player.
- The SportBoost line of Tonics will help the player dodge the Bouncer's charge attack, as well as escape from it.
BioShock 2

An Elite Bouncer in BioShock 2.
- Main article: BioShock 2
Bouncers make a return as enemies in BioShock 2 with exactly the same traits they had in the previous game, despite a slightly different airtank. Bouncers are encountered in the Adonis Luxury Resort, Ryan Amusements and Dionysus Park. Elites are only encountered in Dionysus Park. The Elite Bouncer from BioShock 2 is not white with red trim like in the first game, but a dark gray with red trim, with both still sporting the large red collar. This is merely a cosmetic difference, as both have the same health and attack.
Recommended Plasmids
- Security Command can still be used to take down a Big Daddy, but only if the player has landed the needle on a red area while hacking.
Recommended Weapons and Ammunition
- Since Subject Delta's arsenal has many differences to that of Jack's, the same strategies cannot always be applied (with the exception of some cases where two ammo types are identical in function). However, Big Daddies still remain vulnerable to armor-piercing ammo and electrical attacks.
- Upgrading the Drill will deal additional damage to armored foes, making it a palatable choice in a Big Daddy fight. However, Bouncers are also quite capable of dealing damage up close, so try to use it mainly in finishing moves or in surprise attacks. It is also recommended to get the fuel consumption rate upgrade on the Drill.
- Heavy Rivets always deal more damage than standard Rivets, and should be considered equivalent to armor-piercing ammunition in this case.
- Trap Rivets can be used to set a trap for a charging Bouncer. However, their low damage output compared to a Bouncer's health makes this ammo type slightly uneconomical.
- Armor-Piercing .50 Caliber Rounds naturally work very effectively against armored targets.
- Solid Slugs deal a very high amount of damage, and in this case count as armor-piercing ammunition. The size of Big Daddies compensates for the relative difficulty to aim with this ammo type, and also allows the player to fire from a longer distance as opposed to any other ammunition for the Shotgun.
- Phosphorus Buck deals a high amount of damage and will set the target on fire. This makes it an effective weapon against Big Daddies, especially if used at the beginning of a fight.
- Trap Spears function identically to Trap Bolts, and so can be used in the same situations.
- Rocket Spears deal an enormous amount of damage, even against Bouncers: not only will they pierce them and set them on fire, but they will also explode after a set amount of time, taking away a very large chunk of their health. They also will distract the Bouncer, and if the player accidentally fires an extra Rocket Spear, the Bouncer will fly around and explode after a set amount of time, providing some entertainment as well as potentially damaging nearby enemies.
Recommended Tonics
General
- The Armored Shell line of Tonics will significantly reduce damage received by the Bouncer, making this very useful to have during combat.
- The EVE Saver line of Tonics will reduce the cost in EVE when casting Plasmids.
- Medical Expert will increase the player's First Aid Kit carrying capacity by one, thus allowing the player to endure longer battles.
- EVE Expert will increase the player's EVE Hypo carrying capacity by one, thus allowing the player to endure longer battles.
Bouncer
- Electrical Storm, Fire Storm, Elemental Storm and Ice Storm all emit an attack when struck by a melee attack, thus making them very useful against Bouncers.
- Sports Boost will help the player dodge the Bouncer's charge attack, as well as escape from it.
BioShock Infinite

The Bouncer corpse along a mourning Little Sister, as seen in BioShock Infinite.
- Main article: BioShock Infinite
The Bouncer doesn't appear as an enemy in the game, however, when Elizabeth transports herself, Booker DeWitt, and Songbird to Rapture after destroying the Siphon, a dead Bouncer can be seen in a glass tunnel near the Welcome Center with its Little Sister weeping beside his corpse.
Burial at Sea - Episode 1

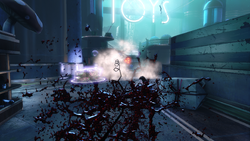
The Bouncer chasing Booker.
- Main article: Burial at Sea - Episode 1
The story is set right before the 1958 New Year's Eve Riots, and the Bouncer can also shoot its drill like a grappling hook, used to navigate easier underwater but also to pull its enemies towards him, whether they are on ground or riding Pneumo Lines.
Strategy Changes
- The drill also functions as a grappling hook—able to be fired at the player to pull them closer, or yank them off of Pneumo Lines.
- The Bouncer can also move long distance quickly by using its drill, but their running speed decreases in comparison with previous games.
- When it slams the ground with its drill, it not only causes stunning, but also damages just like the Handyman.
Strategy
- Always have a high amount of EVE and ammunition.
- Summon a Motorized Patriot through Tears to distract the Bouncer.
- If the Bouncer gets close enough to attack you, hitting it with Air Grabber will temporarily make it stop chasing and stand back.
- When the Bouncer launches its drill, quickly hide behind obstacles. If you're riding Pneumo Lines, quickly change direction or jump down.
- Keep running around obstacles prevents the Bouncer from melee attacking or launching its drill. Because of the decreased running speed of the Bouncer in this DLC, it'll just chase you over and over until you stop.
Recommended Plasmids

The Bouncer slamming the ground with his drill.
- Shock Jockey will temporarily stun the Bouncer, but don't use One-Two Punch strategy because the Air Grabber deals only minor damage against it.
- Old Man Winter will stun the Bouncer like Shock Jockey, but it also adds bonus damage to each shot during freezing.
- Devil's Kiss will drain its health over time. Setting down traps is also effective, especially when the Bouncer chases you or tries to charge at you.
Unrecommended Plasmids
- Possession is totally ineffective against the Bouncer.
- Bucking Bronco can make the Bouncer airborne. but it is less effective than Shock Jockey or Old Man Winter.
Recommended Gears

The Bouncer impaling Booker.
- Roar to Life will make you easy to escape from the Bouncer's attack. Because the Bouncer's attack is powerful enough to break your Shield in one hit, this Gear will allow you to run away to a safe place and rearrange.
- Surprise Element will give bonus damage and will temporarily stun the Bouncer without using Plasmids. It can be used more effectively in combination with the Tommy Gun and Carbine.
- Magic Bullet will give extra bonus damage when critical hits go into effect, and will reduce the probability of running out of ammunition.
- High and Mighty will provide a Winter Shield which prevents damage caused by any types of Bouncer's attack. It can come in useful when the Bouncer launches its drill and knocks you off the Pneumo Lines.
Recommended Weapons
- The Tommy Gun can give continuous damages thanks to a high ammunition capacity and high rates of fire. The Tommy Gun can come in handy when it's used with combination of Gears, especially Surprise Element.
- The Carbine's magazine size is smaller than that of the Tommy Gun. But its shot is more powerful than the Tommy Gun, and its rate of fire gets abreast of the Machine Gun. It can be also more effective when used with Gears.
- The Shotgun has a low magazine size and is effective in close quarters, but its first shot always stuns the Bouncer temporarily while dealing huge amounts of damage.
- The Hand Cannon is easy to use in middle or long distance.
Unrecommended Weapons
- The Radar Range has plentiful ammunition and a high rate of fire, but it takes lots of times to beat down the Bouncer. Even you upgrade Radar Range to slow enemies down when it's in use, the Bouncer will easily overcome slowing down effect by using charge or launching its drill.
Burial at Sea - Episode 2

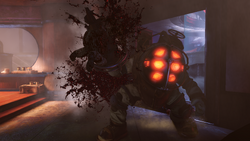
A Bouncer impaling a Splicer with his drill.
- Main article: Burial at Sea - Episode 2
Elizabeth encounters Bouncers again during her adventures through Rapture. The first Bouncer can be found in Bathyspheres DeLuxe. Other Bouncers can be found in Suchong's secret lab. Elizabeth repaired and bonded the Bouncer that killed Yi Suchong.
Strategy Changes
- Unlike Episode One, it is impossible to damage the Bouncer in any way. Even attacks from Splicers will only anger the Bouncer.
- When the Bouncer's lights turn red, it attacks anyone (both Elizabeth and Splicers) nearby.
Strategy
- The Bouncer is not as sensitive as the Splicers, so crouching down and hiding behind the obstacles when the Bouncer approaches makes it easy to avoid it.
- In emergency situations, avoiding the Bouncer by riding ornamental lighting sconces can also be useful. But don't hang from sconces too long, or the Bouncer will launch its drill to get you off.
Recommended Plasmids
- Peeping Tom is the easiest way to avoid the Bouncer. It will be more useful if you upgrade it.
- Old Man Winter will freeze the Bouncer in place for a limited time.
- Possession is a last resort if you can't avoid the Bouncer without being caught. It pacifies the Big Daddy temporarily and will make it continue on its path.
Recommended Weapons
- The Noisemaker Bolt is the only effective ammunition to avoid Bouncer by diverting its attention from you.
Gallery
BioShock
")
")
")
")
")
")
")
")
")
")
")
")
")
")
")
")
")
")
")
")
")
BioShock 2
")
")
")
")
")
Burial at Sea
")
")
")
")
")
")
")
")
")
")
Early Bouncer Prototypes
")
")
")
")
")
")
")
")
Merchandise
")
")
")
")
")
")
")
")
Bugs/Glitches
-
 When searching the Bouncer that attacks the player on the level Proving Grounds, it will be designated as "Elite Bouncer." This would appear to be an oversight of the developers, as this Bouncer does not have the same red trim or harpoon drill that normal Elite Bouncers have. However, that Bouncer does have as much health as an Elite Bouncer.
 - Although rare and hard to get to happen, a Spider Splicer could land on top of a Bouncer, resulting in the Spider Splicer (or both) getting stuck on the spot.[confirmation needed]
Behind the Scenes
- For appearances of the Bouncer outside the BioShock series, see BioShock in Other Media.
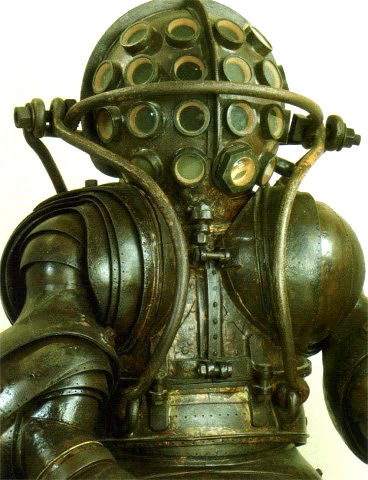

A picture of the French Carmagnolle diving suit; the Bouncer's design inspiration.
- The Bouncer is the iconic face of the BioShock series, being featured in most of the trailers, on the cover of the BioShock game box, and as a doll or figurine (both in-game and in real life) in BioShock 2.
- The design of the Bouncer appears to have been based off that of the 1882 French Carmagnolle diving suit.[1]
- As seen above, the hydraulic weapons were eventually revised by Rob Waters and Nate Wells with various default images, from marshmallows to even human butts, before being finalized with a Drill.[2] One of the first models also had dual grinders instead of a drill[3] (see gallery above).
- In BioShock: Remastered's developer commentary, 'Imagining Bioshock Rapture's Denizens', video footage of the early Bouncer is seen to turn hostile the moment the character is seen and can also be seen taunting beforehand.
- In all promotional artwork and trailers, the Bouncer's drill appears to have a corkscrew-like drillhead. This design does not appear in-game, likely due to limitations in model polygons not being able to make very small shapes in the game's engine.
- The small airtank was another feature which was altered in the Bouncer's appearance. Originally from the promotional images of BioShock, the airtank had bar-like supports with a small bent gauge. In the final version of the game, it was replaced with a more complex design, featuring a large smoking pipe attachment stacked above the air tank, with a compressor-like attachment on the right side linked with a pipe from below the air tank. Despite this, the original air tank on the Bouncer is mostly seen in promotions for both the first and second BioShock games, and is even present on the action figure version of the character from NECA's BioShock 2 toy line.
- This older design was reused in Burial at Sea - Episode 2, in which the Bouncer's gear show a cleaner appearance (see below).
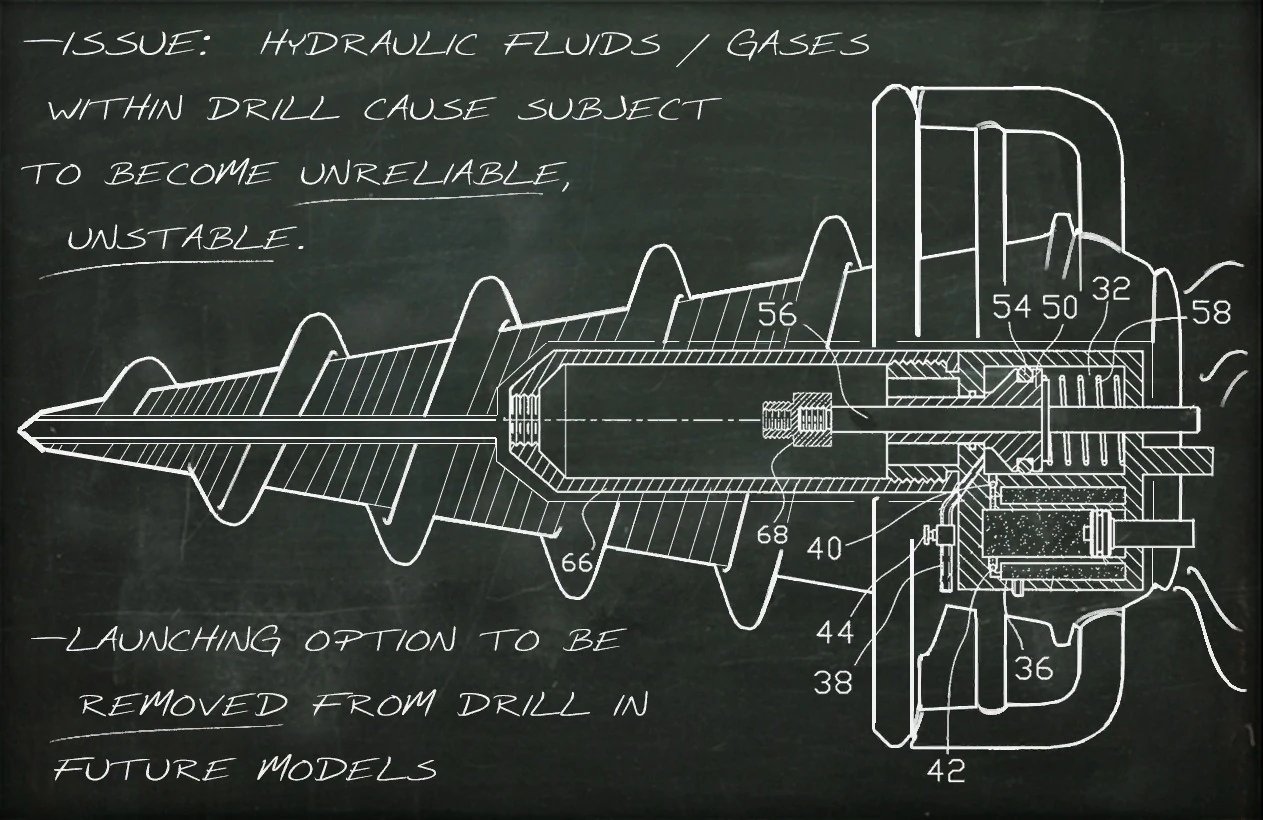
Chalk Board from Suchong's Lab showing the problem with Bouncer Drills.
- In BioShock Infinite's downloadable content, Burial at Sea - Episode 1, it is revealed that Bouncer types (as well as Rosies) were originally construction workers—they've been used to drill deep sea rocks for the expansion of the city and can get to other areas of the city using a grappling hook effect with their drill.
- Gameplay-wise, the drill-hook feature was added due to Pneumo Lines being implemented to function similarly to Sky-Lines in Columbia, in the same way as Handymen being able to electrify them. Otherwise, Pneumo Lines would be a safe-haven for players to freely attack Bouncers, which originally had only melee attacks.
- Story-wise, the reason why this capability wasn't seen in the first two games is explained in Burial at Sea - Episode 2. As explained by Dr. Suchong on a chalkboard in his clinic, the drill launch system was removed from later models due to the pressured fluids and gas inside the drill causing the Bouncer to become unstable.
- The Bouncer's gear is noticeably cleaner in Burial at Sea - Episode 1 than their BioShock counterparts. Both the gear and gloves are grayish white; likely because Big Daddies were getting better maintenance before the Civil War, and later are more worn, stained with blood/rust until they turned to the brownish/reddish color. The outfit itself likely becomes later discolored from prolonged exposure to dirt, algae and mold to the point that it turns a shade of dark olive or forest green tone. By the time of BioShock 2, the suit's white color has become a very dark green.
References
- ↑ Carmagnolle Diving Suit at DivingHeritage.com
- ↑ January From the Vault from Irrational Games
- ↑ BioShock: Breaking the Mold at The Cult of Rapture.
| Enemies in Rapture | |||
|---|---|---|---|
| Splicer | Protector | Security Device | |
| Enemies in BioShock | Thuggish Splicer · Leadhead Splicer · Nitro Splicer · Houdini Splicer · Spider Splicer | Bouncer · Rosie | Security Bot · Security Camera · Turret |
| Enemies in BioShock 2 | Thuggish Splicer · Leadhead Splicer · Brute Splicer · Houdini Splicer · Spider Splicer | Big Sister · Bouncer · Rosie · Rumbler · Alpha Series · Lancer (Minerva's Den) | Security Bot · Security Camera · Turret · Mini-Turret |
| Enemies in BioShock Infinite | ||
|---|---|---|
| Basic | Columbia Citizen • Police • Soldier (Slate's Soldiers) | |
| Support | Gun Automaton • Rocket Automaton • Mosquito • Security Zeppelin • Barrage Automaton | |
| Heavy Hitters | Beast • Boy of Silence • Fireman • Handyman • Motorized Patriot • Siren • Zealot of the Lady | |
| Burial at Sea - Episode 1 and Episode 2 | Beast • Bouncer • Early Splicers (Leadhead Splicer • Thuggish Splicer) • Frosty Splicer • Gun Automaton • Houdini Splicer • Ryan Security • Soldier • Turret | |